MaGeSY ® R-EVOLUTiON™⭐⭐⭐

  • Layering And Filling Sounds Explained TUTORiAL-HiDERA-MaGeSY

    Layering & Filling Sounds

    HiDERA | 26 January 2025 | 229 MB

    Are you tired of feeling that your tracks sound a bit dull and lifeless? Don’t you wish there was a way you could make them sound … well … bigger and better? You’ve come to the right place! In this video course, production expert Thomas Cochran will show you numerous ways to convert a stale, anemic-sounding instrument to something that commands attention and turns an ear. With the sound-layering techniques you learn in this tutorial, you’ll never have to settle for a lackluster track again! These videos are designed for producers and recordists that want to increase the impact and vibe of their instrument tracks. After welcoming you to the production course, Thomas begins showing you ways to add texture and movement to sounds, lending complexity to your production without adding clutter. This is done through bit reduction, adding saturation to reverb, and layering a granular synth patch on top of a simple sine keys part. Thomas then shows how you can add depth to a track with modulation and delay effects, which is useful for filling up space without adding another instrument. Next, you’ll discover how duplicating instrument parts (melodies, chords, etc.) with another sound (or more) can greatly increase the depth and texture of an existing part. The great thing about this technique is that virtually any sound is fair play, as they will all complement the original track in a unique way.


    Viewed 8385 By Music Producers & DJ´s.


  • Logic Pro for the Virtual Composer Explained TUTORiAL-HiDERA-MaGeSY

    Logic Pro for the Virtual Composer

    HiDERA | 26 January 2025 | 236 MB

    Logic Pro expert Stephen O’Connell presents a highly informative Logic Pro video course dedicated specifically to Logic Pro users composing primarily with MIDI instruments. Not only will you learn techniques for easing the burden on your CPU when dealing with resource-intensive VIs, but you will also discover plenty of other helpful tips, such as working with multi-timbral instruments, signal flow routing, resampling sounds, and much more, all of which will greatly improve your workflow. These videos are designed for intermediate Logic Pro users who work with predominantly virtual instruments on a regular basis. Stephen begins with a brief overview of everything that will be covered in this course and then gets right down to business, examining how Logic Pro handles CPU resources and illustrating various ways to maximize your resources in this regard. You’ll also learn how to freeze or disable tracks that aren’t being readily worked on, which will lighten the load considerably (especially in larger sessions), and how to optimize your system for running third-party MIDI libraries. Next, Stephen will show you how to start up Logic Pro without the core audio driver. This is helpful when trying to deal with projects that won’t open correctly or possibly contain corrupted data, etc. This is followed by a demonstration on how to resample sounds from a library when you only need a few notes or phrases, thereby freeing up valuable CPU resources for the other more heavily used instruments.


    Viewed 5761 By Music Producers & DJ´s.


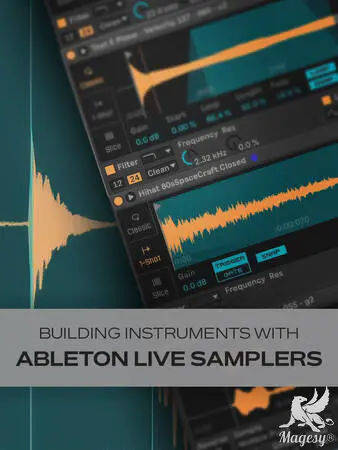
  • Building Instruments With Logic Pro Samplers TUTORiAL-HiDERA-MaGeSY

    Building Instruments With Logic Pro Samplers

    HiDERA | 15 October 2024 | 528 MB

    Join Logic Pro expert Stephen O’Connell for a fun, informative video course on building your own instruments using Logic Pro’s built-in samplers! You’ll learn a ton and have a blast getting creative in new, inspiring ways—not to mention ending up with sounds and instruments that are uniquely your own. By the end of the course, you’ll be ready to start designing your own custom instruments for your very next production with sounds that can truly set your tracks apart from the crowd. Your imagination is the limit! These videos are designed for Logic Pro users that are new to using samplers. Stephen welcomes you and provides a short overview of what will be covered in the series, highlighting the three samplers we’ll be using—Quick Sampler, Drum Machine Designer, and Sampler—all of which are included in Logic Pro. Then Stephen gets down to it, starting first with Quick Sampler, covering the layout of its interface and explaining its capabilities. You’ll learn how to load samples and play them back in various modes (Classic, One Shot, Slicing) to achieve different sounds and effects. You’ll also see how to record a sound directly into Quick Sampler itself with its built-in recorder.


    Viewed 34321 By Music Producers & DJ´s.


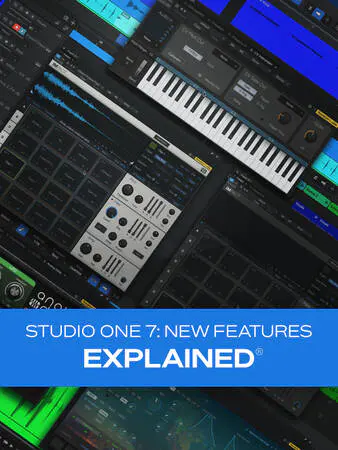
  • Studio One 7 New Features Explained TUTORiAL-HiDERA-MaGeSY

    Studio One 7: New Features Explained®

    HiDERA | 15 October 2024 | 148 MB

    If you’re looking forward to getting the most out of the new Studio One 7 update, you’re in the right place! In this Studio One 7 video tutorial series, Studio One wizard Eli Krantzberg breaks down all the shiny new features and updates, providing plenty of examples and usage scenarios along the way, as well as several tips to help maximize efficiency. From brand new components like Launcher (grid-based music production) and Deep Flight One (virtual instrument) to other updates and enhancements, it’s all covered here in detail, so you’ll be ready to hit the ground running! These Studio One videos are designed for those familiar with Studio One but new to version 7. Eli begins the series by demonstrating the new Splice extension, with which you can work with content from Splice (a huge sample library) directly within the Studio One browser. Next, Eli introduces you to Launcher, a new grid-based production tool that employs a non-linear approach through the use of cells, scenes, and playlists. You’ll learn how to populate the cells by dragging and dropping them from the timeline, Loops browser, or Splice browser, as well as by recording directly to a cell and copying events to other cells.


    Viewed 44459 By Music Producers & DJ´s.


  • Cubase 14 New Features And Updates Explained TUTORiAL-HiDERA-MaGeSY

    Cubase 14 New Features & Updates Explained®

    HiDERA | 07 December 2024 | 446 MB

    In this Cubase 14 video course with Cubase wiz Gary Hiebner, you’ll get the lowdown on all that’s new and shiny in version 14—from the major additions like new plugins and instruments to other practical things like workflow improvements and the like. By the end of this Cubase course, you’ll be well-versed in the new features and ready to begin using them on your very next production. These videos are for users new to Cubase 14. Gary starts the course by highlighting the improvements to MixConsole in the Lower Zone, where you can now see all your faders, inserts, and sends in one convenient place, followed by a look at using key commands to open and close your insert slots. Then it’s on to the LFO Modulator, where you’ll learn how to assign modulators to various instrument/plugin parameters, such as the filter cutoff of a synth. Next, you’ll examine other modulators, beginning with the Shaper, which allows you to draw in your own curves to create your own waveform. You’ll then see how to use Envelope Follower as a side-chain input source for a modulator and tweak the envelope shape for different effects. The Step Modulator is then covered, which allows you to assign each step sequence to a parameter you’d like to modulate.


    Viewed 27566 By Music Producers & DJ´s.


  • Old-School Studio ITB Explained TUTORiAL-HiDERA-MaGeSY

    Old-School Studio ITB Explained

    HiDERA | 20 January 2025 | 546 MB

    In this in-depth production and mixing video course, studio guru Alberto Rizzo Schettino takes you back in time, so to speak, and shows how to recreate the old-school way of recording and mixing while working entirely in your DAW, or “In the Box”. From routing options and session resource management to specific instrument treatment and processing, you’ll work your way through an entire mix, learning all kinds of tips, techniques, and ideas along the way. These videos are designed for those looking to capture that vintage workflow, aesthetic, and sound, all while working entirely in your DAW. Alberto begins with an overview of the series, providing some background on the techniques being used and speaks a bit about the types of outboard gear being emulated. Then you’ll get a run-down of the song being used throughout the course, including the instrumentation and demonstrating the sound trying to be achieved with the virtual old-school session. Next, Alberto starts with the drums, guiding you through a signal flow that includes EQ, dynamics, and more, showcasing the advancements in the digital emulations. Bass and keys follow, and you’ll see how to shape them with amp emulations, distortion/saturation, and EQ/compression so that they fit perfectly into the mix and work in concert with the drums to form the track’s foundation.


    Viewed 27168 By Music Producers & DJ´s.


  • Ableton Live Creative Mix Processing TUTORiAL-HiDERA-MaGeSY

    Ableton Live: Creative Mix Processing

    HiDERA | 20 January 2025 | 158 MB

    Join Ableton Live guru Thomas Cochran for a comprehensive Ableton Live video course on how to get creative with Ableton Live plugins and think outside the box. From creating custom effects racks to building a dynamic EQ without the need for external plugins, there’s something here for everyone. By the end of this Ableton Live course, you’ll have a brand new appreciation for what you can achieve with Ableton Live alone, not to mention some newfound creative thinking skills that can be applied in numerous other scenarios. These videos are designed for intermediate Ableton Live users. Thomas welcomes you and then launches into the first technique of creating a dynamic EQ by using Ableton Live’s Envelope Follower plugin, which means you don’t need to rely on third-party plugins. Then you’ll see how to build a custom multi-band effects rack, enabling many advanced mixing and sound design possibilities for your productions. Next, you’ll explore Live’s Drum Buss plugin and learn ways to optimize your workflow and mix drums and bass quickly and easily. Thomas then shows you how to create some vintage-flavored, cassette-like sounds with a custom lo-fi effects rack. Finally, learn how to build custom delays and compressors by using Live’s groups, paving the way for plenty of other advanced processing techniques.


    Viewed 9307 By Music Producers & DJ´s.


MaGeSY TeleGram Subscribe & Stay up to date with all the Posts that are published in MaGeSY MaGeSY Podcast: Subscribe & Stay up to date with all the Audio Posts that are published in MaGeSY MaGeSY Instagram Official MaGeSY-Youtube Official MaGeSY-X Official MaGeSY-Facebook Official MaGeSY-Pinterest Official MaGeSY-WhatsApp Channel Official

With Adblocker the page loads slower & avoid enhanced new search


ಮ್ಯಾಜೆಸ್ಯ್

MaGeSY ® R-EVOLUTiON™⭐⭐⭐