• image

    Cubase Chord Track Explained TUTORiAL

    P2P | TUTORiAL | 211.39 MB

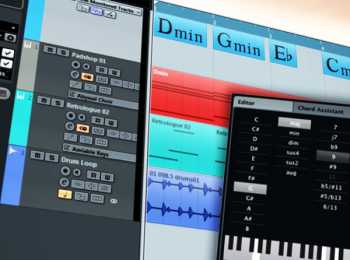
    Cubase has an awesome feature called Chord Track which makes working with chords in your Project Window easy, and allows you to transform and harmonize functions throughout the Cubase application. Steinberg guru Mark Struthers makes understanding and using this powerful feature easy and fast! Mark begins with a detailed introduction followed by how to edit and modify chords. Next he dives into using the Chord Assistant, showing you the different Modes and Types options. Live Transformers are then shown which enables you to transform chords played live into Cubase and more.


    Viewed 2928 By Music Producers & DJ´s.


  • image

    EZdrummer for PC Explained TUTORiAL

    SYNTHiC4TE | Sept 28 2013 | 289.83 MB

    MAKING DRUM TRACKS JUST BECAME EASIER

    Toontrack EZdrummer is a fabulous tool for creating realistic drum tracks, fast and easy. In this series, EZdrummer guru Mark Struthers shows you how to get this virtual instrument up and running on PC, as well as all of its features and functions. Mark starts out with detailed introduction and PC installation tutorials, then covers how to setup the Toontrack Solo application. Next, latency and buffer sizes are explained, followed by the EZdrummer user interface. Mark then shows you how to audition grooves, adjust humanize, velocity and tempo parameters, user grooves, expansion packs, the EZPlayer, working within a DAW and how to use multiple outputs.


    Viewed 3988 By Music Producers & DJ´s.


  • image

    Vienna Ensemble Pro Explained TUTORiAL

    MP4 | May 08 2014 | 419 MB

    Presented by orchestral and studio wiz Eli Krantzberg, this series is the one Vienna Ensemble Pro users have been waiting for. Eli covers all the features and functions of the industry standard, world-class Vienna Instruments and Vienna Ensemble Pro , and shows you creative ways to maximize their power and sound. If you use Vienna Ensemble Pro, this series is a must see. Eli starts with an introduction welcoming you to the series and lays out the road ahead. Next he jumps right into installation and authorization of VEP, followed by an in-depth video covering the important basics. of Vienna Instruments. Switching between Articulations is then demonstrated followed by the powerful Slot Rack, where you’ll learn how to stack patches for a layered sound, transpose the slots individually, set independent velocity curves, adjust volume and pan settings and much more. Eli then reveals the Global Controls and how to work with Matricies, giving you complete control over the entire instrument as well as personalize the factory Epic Orchestra.


    Viewed 2728 By Music Producers & DJ´s.


  • Bitwig Studio Explained TUTORiAL
    May 2nd, 2014 ⚡
    Categories:

    image

    Bitwig Studio Explained TUTORiAL

    P2P | May 2014 | 753.21 MB

    Bitwig Studio is a new, dynamic software solution for music creation and performance to realize all of your musical ideas in every stage of production, and studio wiz Timothy Allan is just the man to show you how it all works! This is the most comprehensive Bitwig Studio video title available, so follow along and see just how awesome this DAW really is. Tim starts at the very beginning, showing you how to Install and Activate Bitwig Studio, and then how to set up an Audio Interface and MIDI Controller so they’re recognized by the software. Tim then rolls up his sleeves and shows you how to Navigate around the DAW, all about the Header Interface, Browser Access Panel and Tracks Overview. This will get you going fast and give you a solid operational foundation for Bitwig Studio.


    Viewed 2456 By Music Producers & DJ´s.


  • image

    KONTAKT 5 Update Explained TUTORiAL

    TEAM MATRiX | 30.04.2014 | 249 MB

    Studio master Mark Struthers shows you everything you need to know about the new features added to KONTAKT version 5. See and learn all the new features and functions that this powerful update brings to this world-class software sampler. Mark begins with an introduction briefly discussing the new additions to KONTAKT 5. He then begins with a detailed look at the new filters included with version 5, revealing the Variable Filters, SV Filters, Ladder Filters, Adaptive Resonance Filters and more. Time Machine Pro is then explored and you’ll see just how easy it is to pitch shift material while keeping its original tempo in place. Mark now goes old school and breaks down the new SP1200 and MPC60 MASCHINE Sound Engines that are built into KONTAKT 5, giving you that great vintage vibe for your samples.


    Viewed 3732 By Music Producers & DJ´s.


  • Spire Explained TUTORiAL
    April 29th, 2014 ⚡
    Categories:

    image

    Spire Explained TUTORiAL

    Team SYNTHiC4TE | April 29 2014 | 351 MB

    UNPARALLELED SOUND & USABILITY

    Laurence Holcombe is back and this time breaks down the incredible virtual synth Spire by Reveal Sound from beginning to end. This synth is truly amazing sounding and disproves any ideas that software synths don’t have the “big, fat sound” that hardware synths do. Follow along with Larry and see and hear for yourself! Laurence begins with a detailed introduction to the powerhouse synth and its GUI, followed by how to Choose and Save Presets and Banks. Next, you’ll learn all about Spire’s Oscillators, Unison and Play Modes, The Filters (including how to make a 303 type sound) and more.


    Viewed 2829 By Music Producers & DJ´s.


  • Reaper Signal Flow Explained TUTORiAL
    April 11th, 2014 ⚡
    Categories:

    image

    Reaper Signal Flow Explained TUTORiAL

    Team SYNTHiC4TE | April 10 2014 | 431 MB

    LEARN THE INS AND OUTS

    If you’re new to Cockos Reaper, or just want to learn more on the art of routing and signal flow, this title is a must have. Multi-Platinum Producer / Mixer Kenny Gioia shows you what you need to know about both basic and advanced signal flow and routing in Reaper, making your time spent in Reaper more efficient and creative. Kenny begins with an introduction explaining the important basics of Signal Flow in Reaper using pictures and diagrams. He then dives right in, revealing Reaper’s Virtual Patch Bay, where you’ll learn to recognize and utilize inputs, outputs, routing tracks and more. Channel Signal Flow is then explained and you’ll discover Input FX, Track FX, Item FX, Sends, Pans, Master Parent Send and how and when to use them.


    Viewed 3356 By Music Producers & DJ´s.


MaGeSY TeleGram Subscribe & Stay up to date with all the Posts that are published in MaGeSY MaGeSY Podcast: Subscribe & Stay up to date with all the Audio Posts that are published in MaGeSY MaGeSY Instagram Official MaGeSY-Youtube Official MaGeSY-X Official MaGeSY-Facebook Official MaGeSY-Pinterest Official MaGeSY-WhatsApp Channel Official

With Adblocker the page loads slower & avoid enhanced new search


ಮ್ಯಾಜೆಸ್ಯ್

MaGeSY ® R-EVOLUTiON™⭐⭐⭐