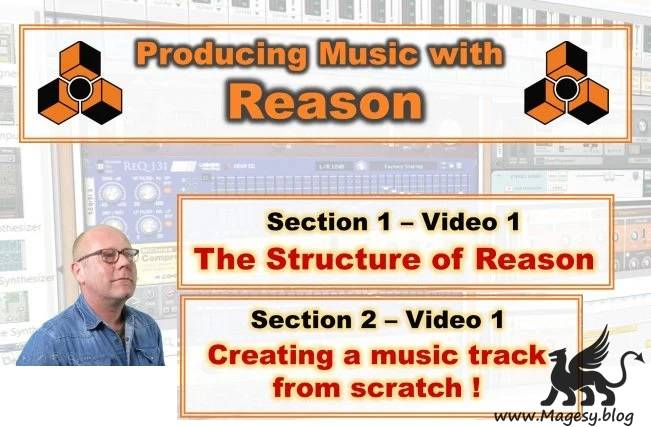
Producing Music With Reason
Team iLLiTERATE | 21 September 2020 | S1: 1 GB | S2: 1.7 GB
Level: Beginner and intermediate level user
This series of videos is an introduction class to the music production software: Reason.
Section 1: The Foundations:
Video 1: The structure of Reason.
This video initiates the class with a theoretical description of the structure of the software. Understanding how Reason is organised allows to master the flow of sound and music data within it. Reason is composed of three main modules: The sequencer, the Rack and the Mixer. We will describes these and look together how the sound flows between them.Video 2: Moving around the sequencer, the rack and the mixer
The second episode shows the 4 ways to start up the beast, and how it presents itself on your computer. You will get familiar with the three main windows and learn how to navigate between them (using the mouse or keyboard shortcuts).Video 3: First notes in Reason
In this video, you will learn how to create a synthesiser in the rack and play a few notes. This will allow you to observe where the sound goes in the software and give you a perfect opportunity to learn what is meant by “the rack” and by “device”. You will also record a few notes in the sequencer as well as some MIDI parameter data. This will give you the opportunity to learn a few basic editing techniques as well as how to hook up a knob of your midi controller to a midi parameter in the rack, and record its real time motion!Video 4: Applying effects
In this video, you will start having a glimpse of Reason’s musical power. In this episode, we will edit the MIDI clips we created in the previous video to adjust them to our liking. Then you will learn how to connect effects to the synth created in the previous video and how to set them up to get the sound we want. This will give you the opportunity to discover two of Reason’s effects modules: The Echo and The Rev7000. We will record variations of these effects with time by assigning some of their parameters to knobs on our MIDI controller.Video 5: Exercise – creating a spacey Piano
A challenge for you! From what you have learned in the videos up to now in the course, you should be able to create a spacey piano sound from scratch . Try it, seriously! that effort will allow you to get familiar with the basics and prepare you for the second section of the course.Section 2: Creating a Music Track:
Video 1: contents of this class
This is what you will learn in this section:
– Navigate across the windows and manipulate editing tools,
– Get familiar with the rack structure,
– Create instruments in the Rack, and apply effects to them,
– Record and edit in the sequencer MIDI notes and parameter automations.
– Basics of a synth and how to manipulate some of the synth parameters while knowing what you are actually doing,
– Basics of drum machine programming,
– Using and editing audio samples in the sequencer,
– And many other useful things, like shortcuts and tips which are spread around this section.Video 2: Creating a Beat in Reason
This episode will show you the different options Reason offers you to create beats (audio loops, sliced Rex loops, Kong Drum machine and Redrum drum machine).
We will focus on one specific option to create a basic beat (programming a drum machine, The Redrum) and record it in the sequencer via the Pads of our MIDI controller. Our MIDI recording will allow us to go a little deeper in the editing process and learn some cool editing tips.Level: Beginner.
Note: This video is not an extensive list of ways to create beats in Reason. There is another powerful option that is not mentioned here but it uses Refills (for example BFD with MIDI clip importation).
Video 3: Sound generation basics + recording a synthbass line
In this video, we will create a bass line using the Subtractor synthesizer. This will give us the opportunity to get introduced to synthesizers. We will briefly describes the basic functions of a synth so that we can generate a sound. We will also do a little theory here by describing how sound can be described as waveforms. We will listen to various waveforms and understand why some can be used for a purpose and some others for another. I will exemplify this by improvising the creation of a jazzy pad. We will then go back to playing, recording and editing a bass line for our music track.Level: Beginner and intermediate level user.
Video 4: Setting up a pad
This video will show you how to create a background Pad in Reason. We will explore how to browse and load a preset in the Rack. This will give us the opportunity to discover what is a Combinator. This will also allow us to explore functionalities of the rack. We will see how to learn about sound design in the rack from these presets. Moreover, we will learn how to change the sound on the fly in order to suit it to our needs. We will conclude by playing, recording and editing a pad for our little music track.Level: Beginner and intermediate level user.
Video 5: Recording a melody + file clean up tips
We have now a beat, a bass-line and a background pad. Time to play, record and edit a little melody using the spacey piano sound we created in the first section! During the creative process, it is important to stay organised in order not to hinder the workflow while composing. The second part of this video will share with you some clean-up tips and a few best practices.Level: Beginner.
Video 6: Sound design a rising woosh (Part 1)
This video and the next introduces you to sound design by creating a rising whoosh sound from scratch. Such sound is often used to announce a change or transition in a song, especially in electro and techno. We will use for this a Thor synthesiser. This first part will share with you the basics of the Thor synthesiser by going through its architecture. We will learn how the sound is generated in the Thor and how it flows in its various modules, as well as what these modules do to it.
We will then learn how to generate a white noise that will be the base of our sound and sculpt it with time to make it rise. In addition, to make it sound flashy and spread across the stereo field we will create a chain of effects by connecting various devices to the channel strip containing the Thor synthesiser.Level: Intermediate level user.
Video 6 – part 2: Sound design a rising woosh (Part 2)
– In this video, we will insert our Whoosh sound in our mini music track. For that, we will sculpt it to our liking by recording in real time synths parameters and the motion of the channel strip fader in the sequencer.
– In the process, we will realise that our whoosh doesn’t sound that good, so we will troubleshoot to analyse what is missing and correct it by modifying some synth parameters. We will also add an – EQ and a maximiser to the effect chain we created in the previous video.Level: Intermediate level user.
Video 7: Importing audio in Reason: an ending impact for our music.
In this video, we will import an external audio sample that we will use as final hit for the ending of our music composition. First, we will discuss how and where to find these samples, and the legal implications of using them in a composition. Then we will import an audio sample of a hit, using this example as a good opportunity to get introduced to the basic audio editing tools that are offered in Reason’s sequencer. We will explore this a little further by importing an audio loop of a beat, and replacing our current beat with it, just to hear what it sounds like. This is a great way to explore alternatives and change the feel of a composition drastically.Level: Beginners and intermediate level user.
INFO/DEMO/BUY S1: https://mage.si/n180
INFO/DEMO/BUY S2: https://mage.si/cgOF
Producing Music With Reason S1-S2 TUTORiALs
https://beelink.pro/43759/Producing-Music-With-Reason-S1-S2-TUTORiALs.html
5266 Views


