Producer’s Guide to Thorn
FANTASTiC | 11 May 2020 | 944 MB
After providing an overview of the synth’s architecture, Rob dives into a series of lessons that explore the less conventional aspects, like its harmonic editing and filtering, sampling capabilities and glitch sequencing. He then moves onto the meat of the course, which is a number of step-by-step guides to creating a wide range of patches, helping uncover all the hidden depths of the instrument, whilst providing a wealth of useful sound design techniques along the way! On the course, you’ll learn how complex patches like evolving basses, floaty sequenced pads and arpeggiated leads are constructed, as well as how to utilise advanced synth features such as FM. Signing up to the course entitles you to immediate access to the 2 hours of streamed tutorials, as well as the 5 presets made on the course and a further 5 bonus presets from Thorn Dance Essentials preset pack.
Module 1 – Introduction to Thorn
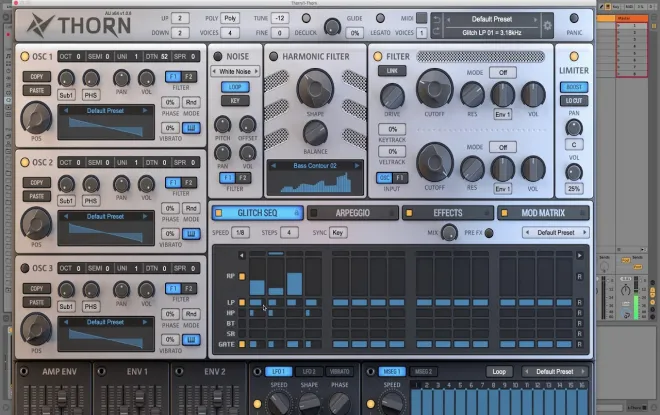
The course starts with an introduction to the synth, looking first at the overall architecture and any deviations from standard instrument layouts or unique features, then focussing on the header bar at the top, showing the preset section and settings menu.
Lesson 1 – Thorn Overview; 02.34
Lesson 2 – Preset Handling and Settings Menu; 03.15Module 2 – Oscillators
A detailed look at the Harmonic Editor, for editing or creating customised waveforms and wavetables, and the oscillator FX, where individual oscillator processing or cross-oscillator modulation can be applied.
Lesson 1 – Harmonic Editor; 05.34
Lesson 2 – Oscillator FX; 02.18Module 3 – Sampling
A demonstration of how the Noise section can be used as a sampler, for layering your own audio samples with synthesised sounds; 03.55Module 4 – Harmonic Filter
Rob explains the various controls and options in the Harmonic Filter section, for manual sculpting of a preset’s spectrum; 03.57Module 5 – Glitch Sequencer
A guide to Thorn’s glitch sequencer, for application of automated FX sequences; 06.32Module 6 – Preset 1 – Glitchy Bass FX Sequence
The first preset on the course is quirky, rhythmic FX one, showing some very useful techniques in its conception, including numerous modulation of oscillator and filter parameters, how to set the filters in series, multistage envelope modulation combined with gated glitch sequencing, and more.
Lesson 1 – Oscillator 1 Filtering and Sequencing; 08.01
Lesson 2 – Oscillator 2, Subs and Serial Filtering; 08.45
Lesson 3 – Applying Effects; 12.47Module 7 – Preset 2 – Sweeping Filtered Bass
An evolving bass patch is created, using oscillator 1 in wavetable mode and modulating the position and phase dials with an envelope to create the sweeping effect. The bass is then filtered using filters 1 and 2 in parallel mode, as well as the harmonic filter, all of which are modulated with envelopes and LFOs. Finally, the transient is bolstered with a percussion sample before various effects are applied.
Lesson 1 – Oscillator 1 Setup and Modulation; 04.19
Lesson 2 – Filters Setup and Modulation; 08.46
Lesson 3 – Adding Perc, Tweaking and Processing the Sound; 04.58Module 8 – Preset 3 – Arpeggiated Lead
A rhythmic lead patch is made, beginning by setting up the 3 oscillators as identical but detuned waveforms, each with some LFO modulation, then using the arpeggiator to create a dancing melodic sequence. Noise is added to the transient before a number of different effects are applied.
Lesson 1 – Setting up Oscillators 1-3; 03.44
Lesson 2 – Adding and Editing the Arp; 07.03
Lesson 3 – Adding Effects; 03.51Module 9 – Preset 4 – FM Bass
Rob shows how to create an FM (Frequency-Modulated) patch, using both oscillators 1 and 2 in FM mode to create distinctive characters in the transient. The filters are then used to process the sound, with filter 2 in parallel providing some upper textures to the patch. Finally, some effects are applied and various parameters adjusted to demonstrate the different timbres on offer.
Lesson 1 – Setting up Oscillators 1-3; 05.03
Lesson 2 – Parallel Filter Processing; 04.39
Lesson 3 – Effects and Modifications; 05.30Module 10 – Preset 5 – Lush Ambient Glitch Pad
A floating pad sound with rhythmic textures is made by first creating a phasing saw by drawing in the Harmonic Editor and then modulating with an LFO, then pasting this to oscillators 2 and 3, which are transposed and spread in varying amounts. The sound is then shaped with all 3 filters before being processed with effects and the glitch sequencer.
Lesson 1 – Setting up Oscillators 1-3; 10.02
Lesson 2 – Filtering; 07.17
Lesson 3 – Effects and Glitch Seq; 05.14
INFO/DEMO/BUY: https://mage.si/O5Sz
Producer’s Guide to Thorn TUTORiAL
https://beelink.pro/41813/Producers-Guide-to-Thorn-TUTORiAL.html
2216 ViewsRelated Post:
Categories:
Submit a Comment or Report Broken Links:


